

Dossier Career break and time credit - online service
Log in to the Social Security portal
The online service is available to employers who have activated their secure access via the Social Security portal via the link Secure access for employers - Social Security (socialsecurity.be) (in French).
Log in
Go to : Dossier Interruption de carrière et crédit-temps - Sécurité Sociale (socialsecurity.be in French) (‘Dossier Career break and time credit’). Click on the ‘Introduire une demande’ (‘Submit a request’) button.
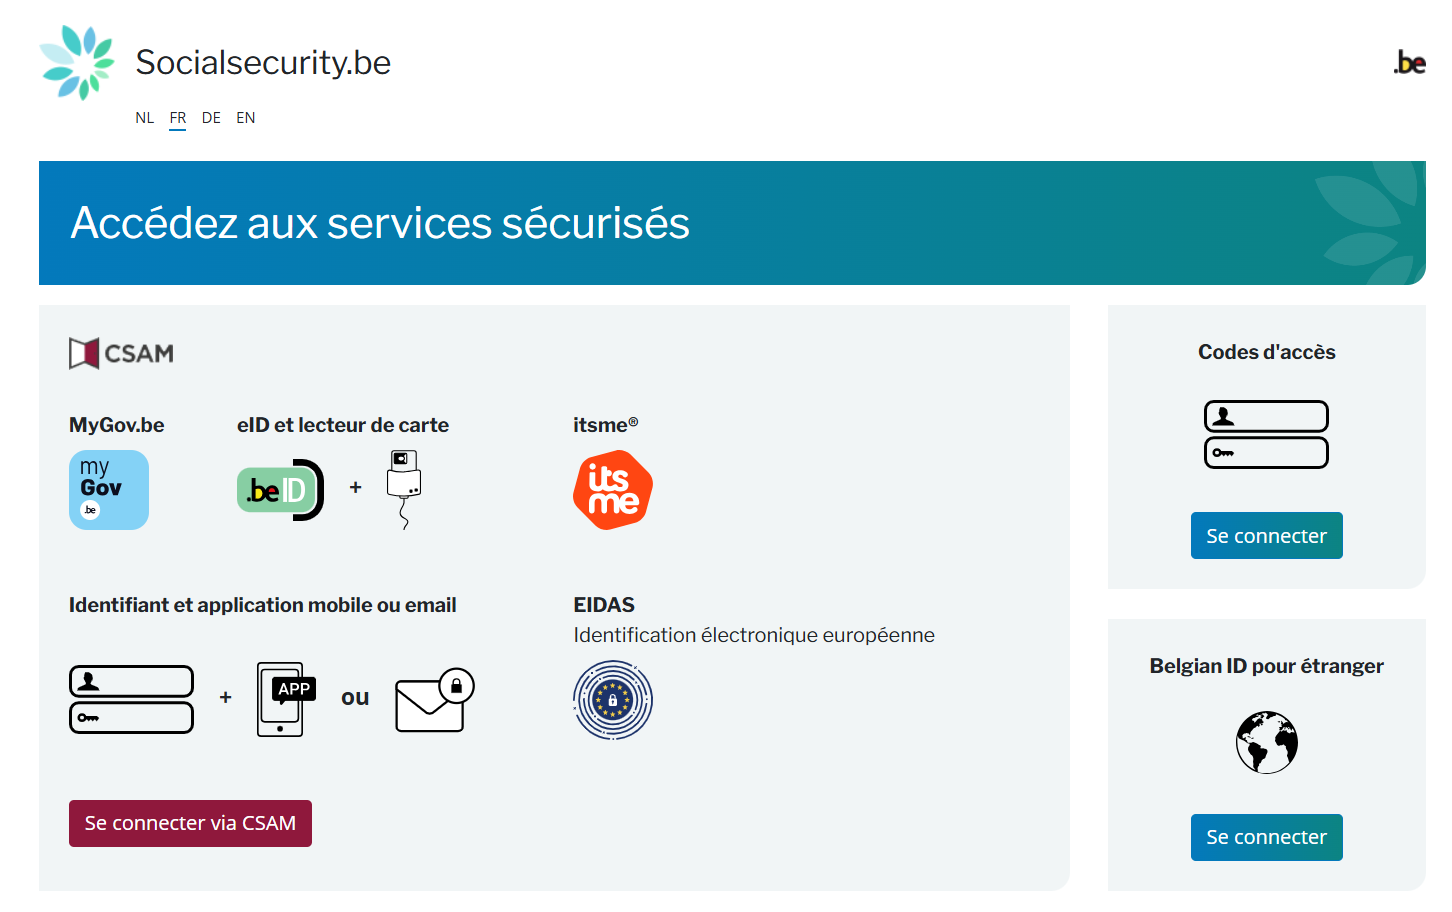
A new page opens. On this new page, click on the ‘Se connecter via CSAM’ (‘Log in via CSAM’) button.
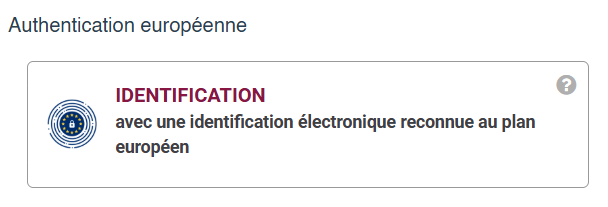
A new page opens. On this new page, click the button ‘Identification avec une identification électronique reconnue au plan européen’ (‘Log in with an electronic identification means recognised at European level’).
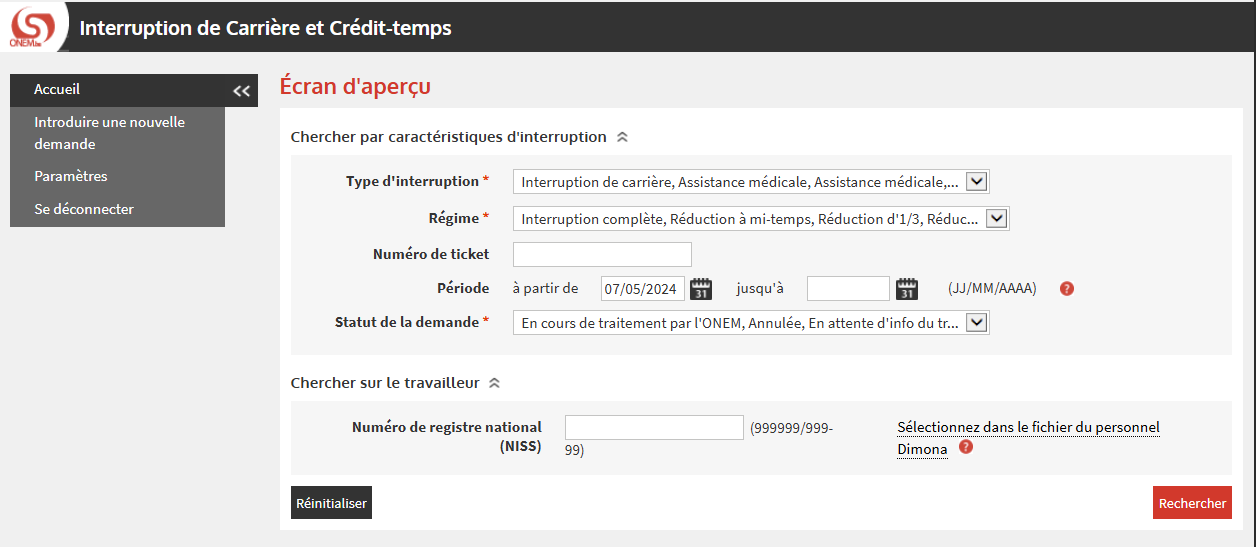
Preview screen
Once you have logged in, you enter the online service. A preview screen opens. On this screen, you can consult the status of requests submitted by your employees over the last two years. You can filter the results by interruption characteristics either in the section ‘Chercher par caractéristiques d’interruption’ (‘Search by interruption characteristics’) or by a specific employee in the section ‘Chercher sur le travailleur’ (‘Search by employee’).
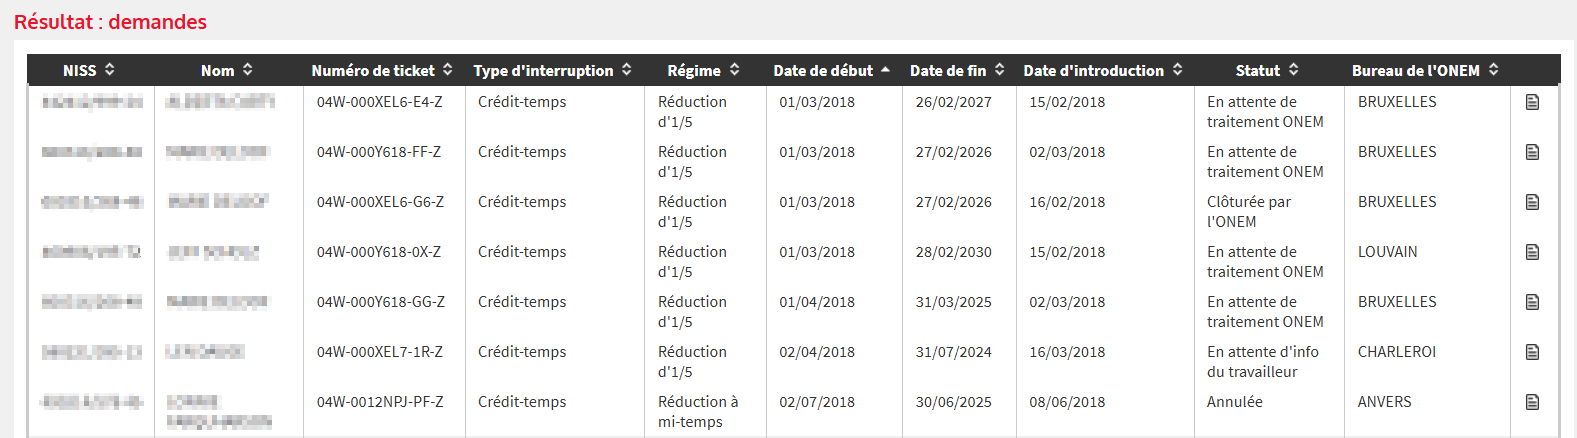
Consulting results
The requests corresponding to the search criteria are displayed in the box ‘Résultat : demandes’ (‘Result of the requests’).
List of notifications
The list of electronic notifications submitted by the employees appears in the box ‘Avertissements à traiter’ (‘Notifications to be processed’).

The notification management table can be accessed by clicking the button ‘Consulter’ (‘consult’) on the very right of the list.
Managing notifications
Via the section ‘Avertissements à traiter’ (‘Notifications to be processed’), you have several options.
You can propose to postpone the notifications entered by the employee. For this, please enter the requested start date in the field ‘à partir de’ (‘from’), then click the button ‘Postposer’ (‘postpone’).

You can also add an attachment if necessary (for example, a certificate sent to you by the employee).
For this, click the button ‘Choisir un fichier’ (‘choose a file’) and select the relevant file on your computer.

Finally, you can decide whether or not to accept the notifications submitted by the employee.
You can refuse by clicking the ‘Refuser’ (‘refuse’) button, or you can accept by clicking the ‘Valider et envoyer’ (‘validate and send’) button.

Encoding and checking parameters
In the ‘Paramètres’ (‘parameters) tab on the left-hand menu, you need to make sure that your contact details are correctly filled in next to the dedicated fields.
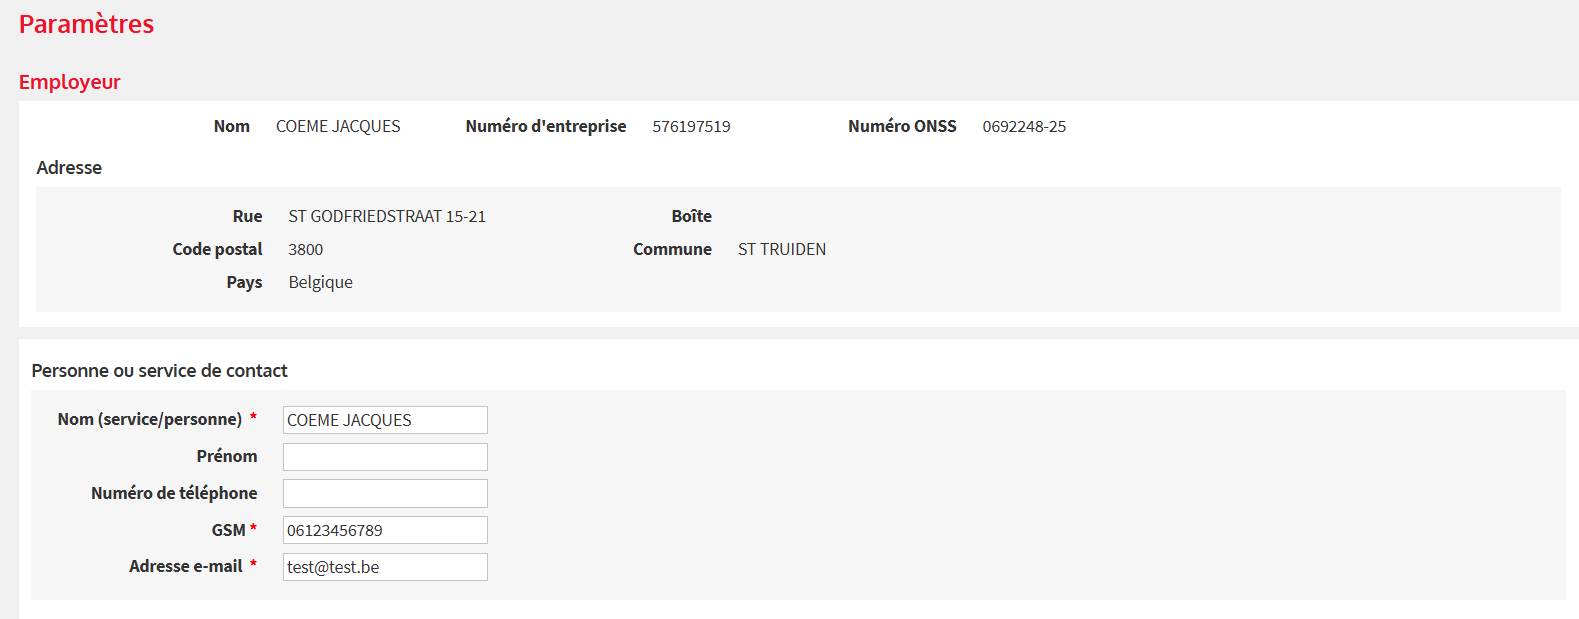
Please make also sure that your sector is selected correctly.

Finally, tick the ‘Les travailleurs peuvent m’envoyer des avertissements‘ (‘Employees can send me notifications’) box if you wish to receive electronic notifications.

Submit a new request
Select an employee
If you click ‘Introduire une nouvelle demande’ (‘Submit a new request’) in the left-hand menu, you will be taken to the screen for submitting a request.
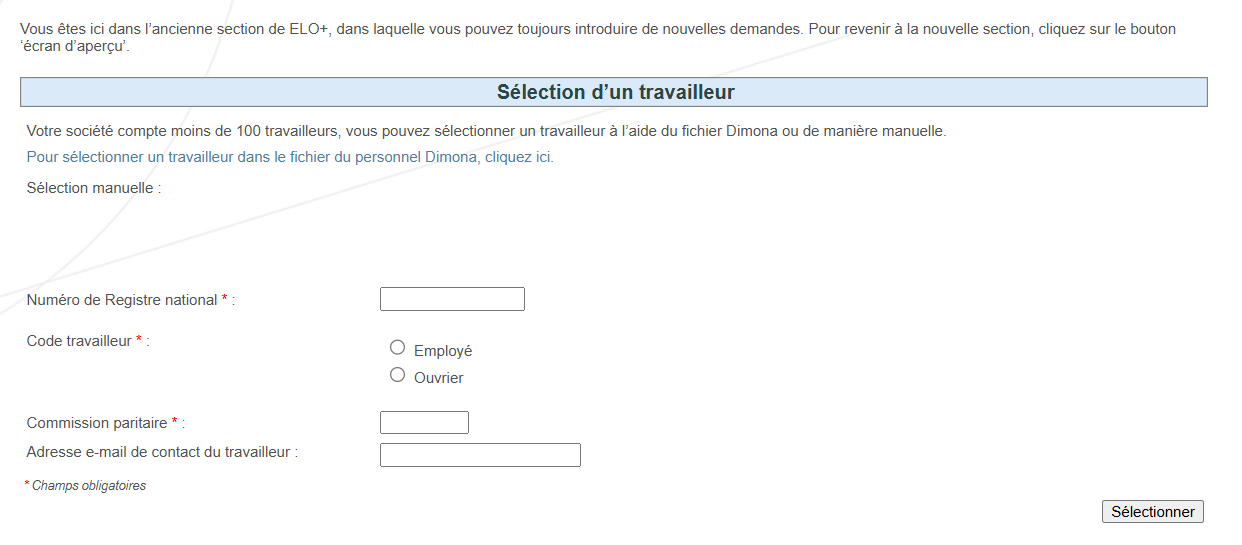
First, you have to select the employee. You can either follow the link ‘Pour sélectionner un travailleur dans le fichier du personnel Dimona, cliquez ici’ (‘To select an employee from the Dimona personnel file, click here’), or enter the employee's national registration number directly in the dedicated field.
Once you have filled in all the fields, click the ‘Sélectionner’ (‘select’) button.
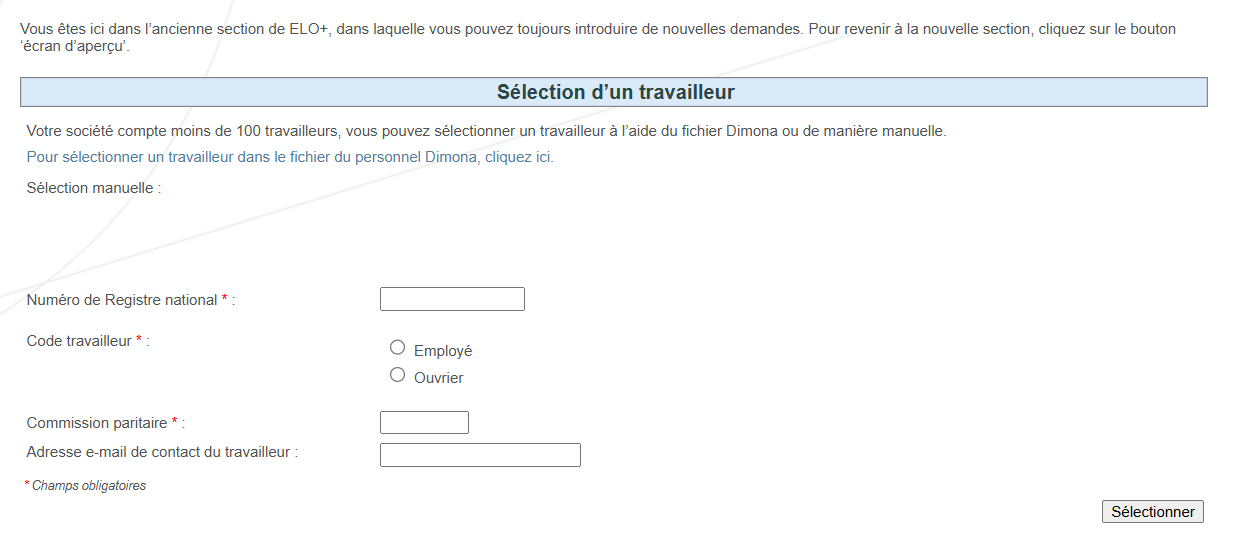
Submit a new request
The employee has now been selected. To submit a request for the employee, click the ‘Introduire une nouvelle demande‘ (‘Submit a new request’) button in the left-hand menu.
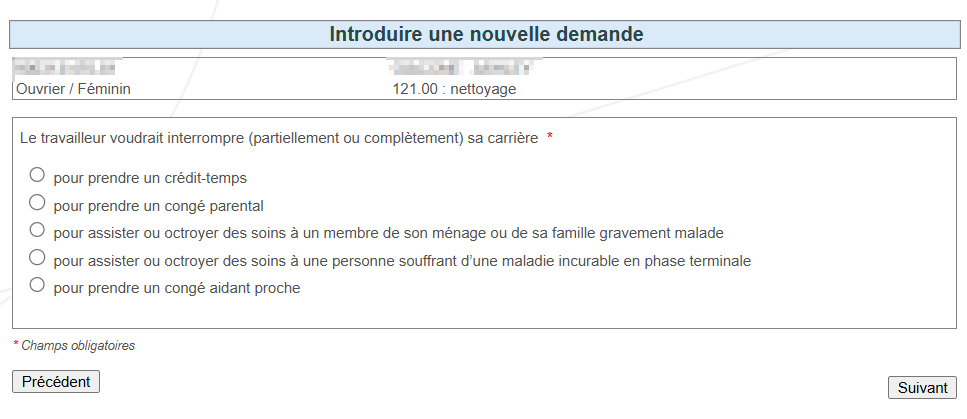
From this screen, choose the type of leave you require and click ‘Suivant‘ ('next’). Follow the on-screen instructions to complete the various fields.
When filling in the application, there will be a screen asking you to provide the characteristics of the break or reduction of working hours, including the work regime before and during the break or the reduction. If you are submitting an application for an employee who works part-time for several different legal employers, tick the ‘Occupation chez plusieurs employeurs’ box.
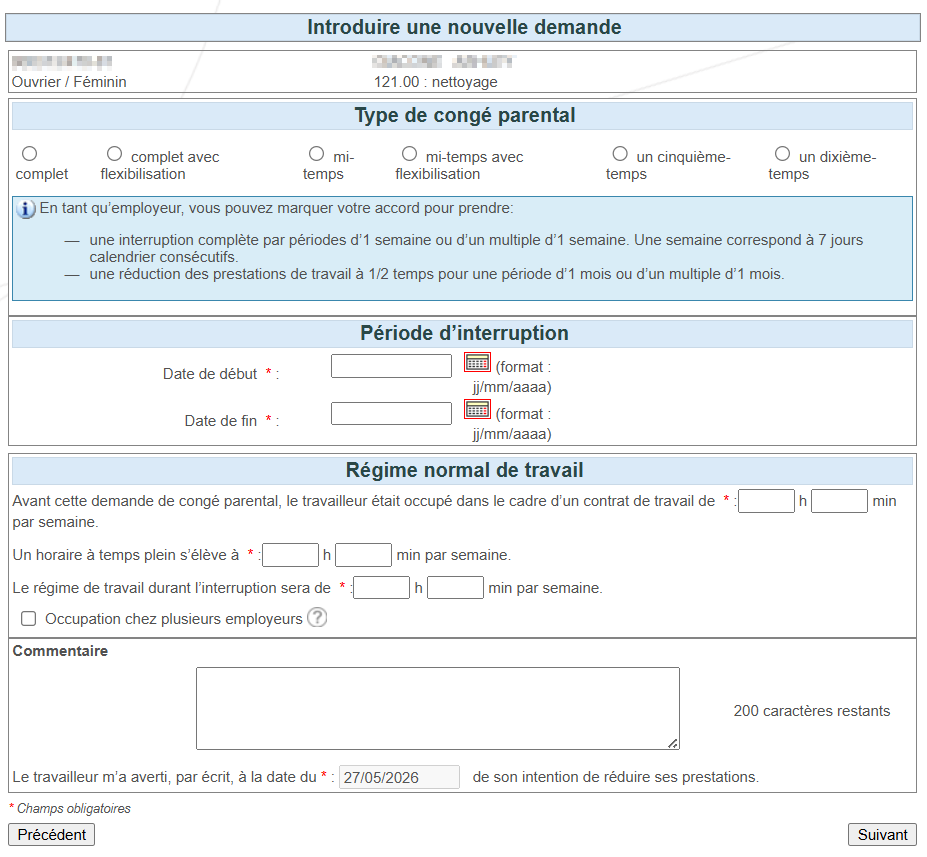
In the case of a break or reduction of working hours with only one employer, the employee must also send the NEO (ONEM-RVA) office a ‘déclaration d’occupation’ certifying the work with the other employer(s).
Once you have completed all the required fields, you will be taken to the confirmation screen.
Please check that all the information is correct. If you have made a mistake, you can go back by clicking on the ‘Précédent’ (‘back’) button.
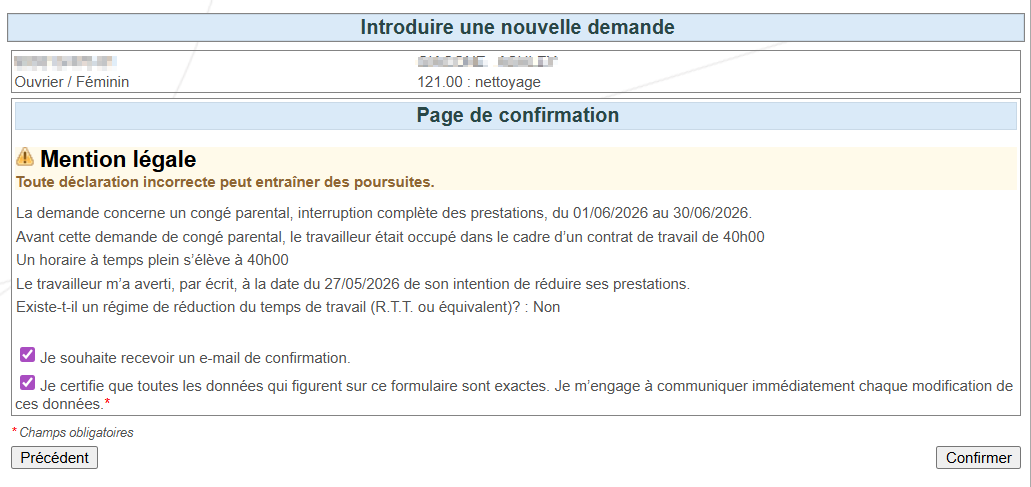
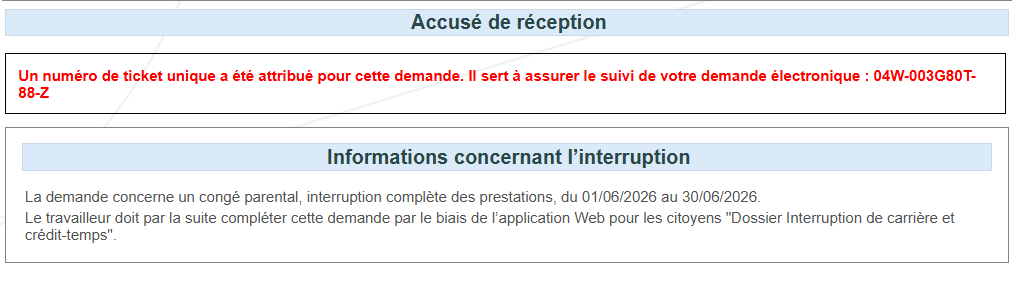
Once the request has been confirmed, you'll receive a ticket number. This is proof that the request has been submitted.
Cancelling a request
To cancel a request you have already submitted, click ‘Annulation’ (‘cancel’) in the left-hand menu. Choose the appropriate request, then click ‘Suivant‘ ('next').
Confirm the cancellation by ticking the corresponding box and clicking the ‘Confirmer‘ ('confirm') button.
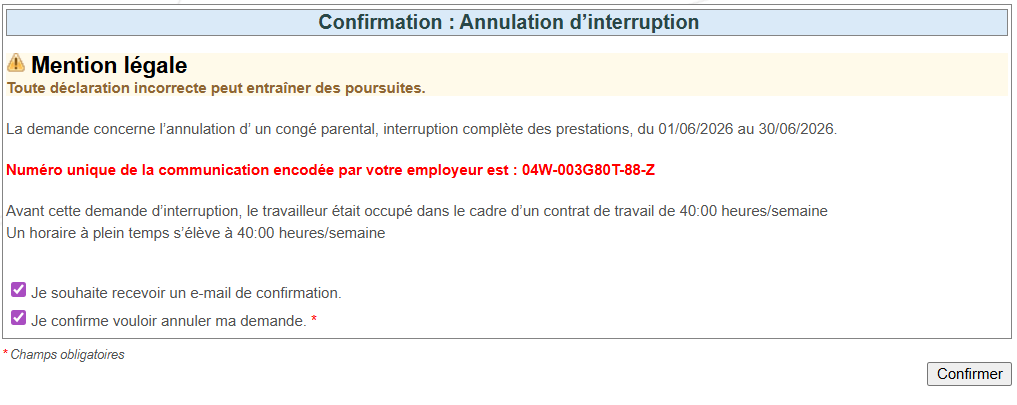 An acknowledgement of receipt is displayed on the screen, confirming that the request has been cancelled.
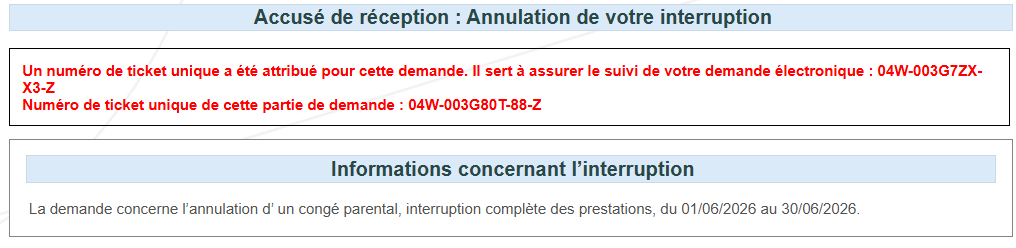
Cancellation is possible as long as the employee has not yet completed their part of the request.
Add an attachment
If you were unable to add the required attachment when introducing your request, you can still do so at a later date. Just click ‘Pièces jointes‘ (‘attachments’) in the left-hand menu and choose the appropriate request.
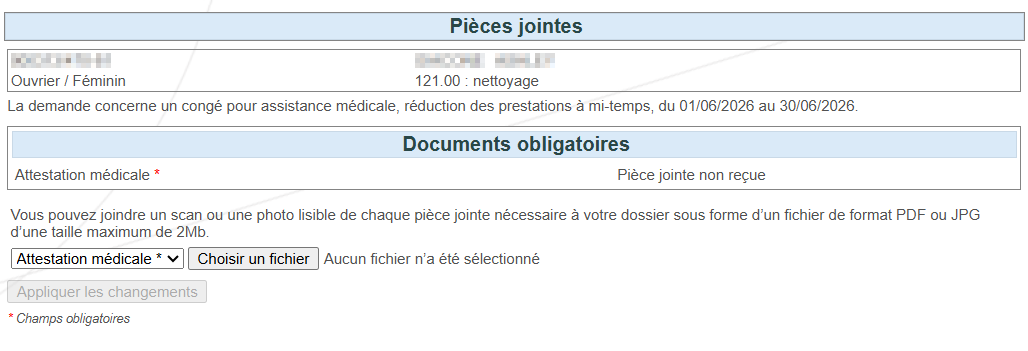
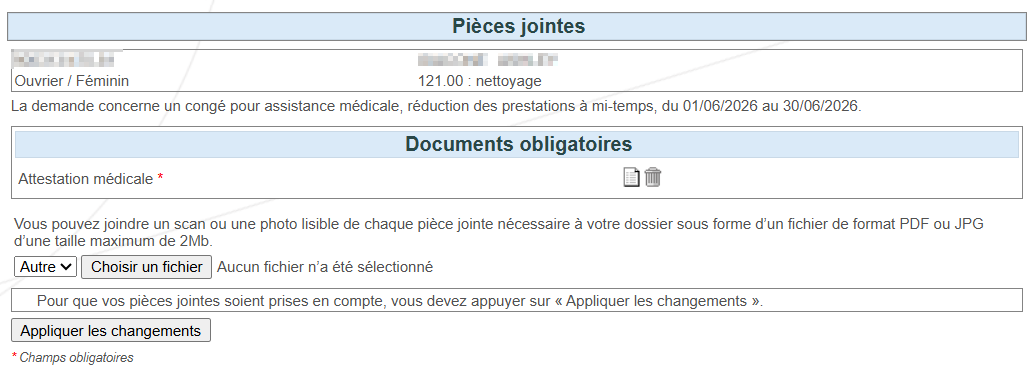
You can add the attachment by clicking the ‘Choisir un fichier’ (‘Choose a file’) button. Once the file has been uploaded, you need to click the ‘Appliquer les changements‘ (‘Apply changes’) button again.
Once the operation has been completed, the message ‘Changements effectués‘ (‘Changes made’) will be displayed.
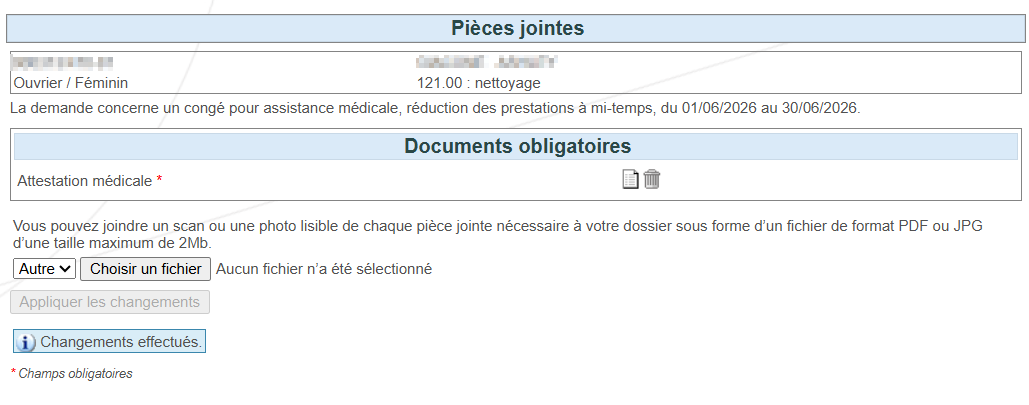
Modifying a request
By clicking ‘Modification’ (‘modify’) in the left-hand menu, you will be taken to the screen where you can change the end date of the request. Please select the request you wish to modify.
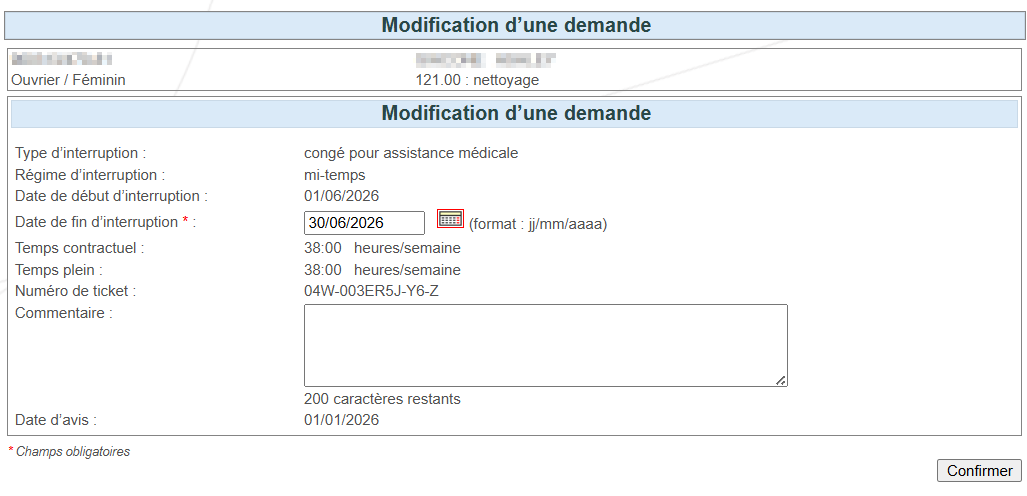
Next, change the end date to your preference. Then click the ‘Confirmer’ (‘confirm’) button.
An acknowledgement of receipt will appear on the screen, confirming that the change has been made.
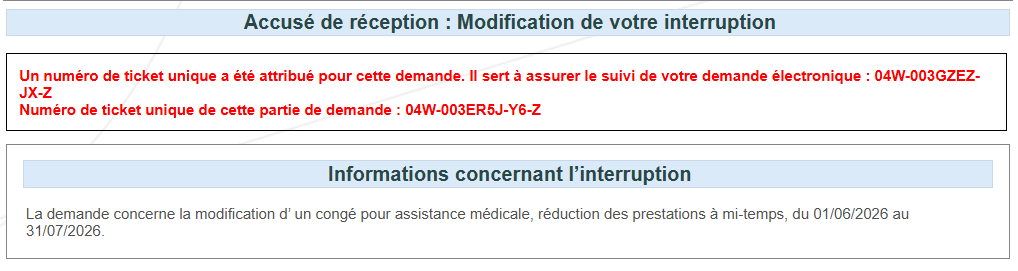
Changes can be made as long as the employee has not yet completed their part of the request.
Consulting a request
If you click ‘Consultation’ (‘consult’) in the left-hand menu, you will be taken to the screen where you can view the details of the request. Select the request for which you wish to consult the data.
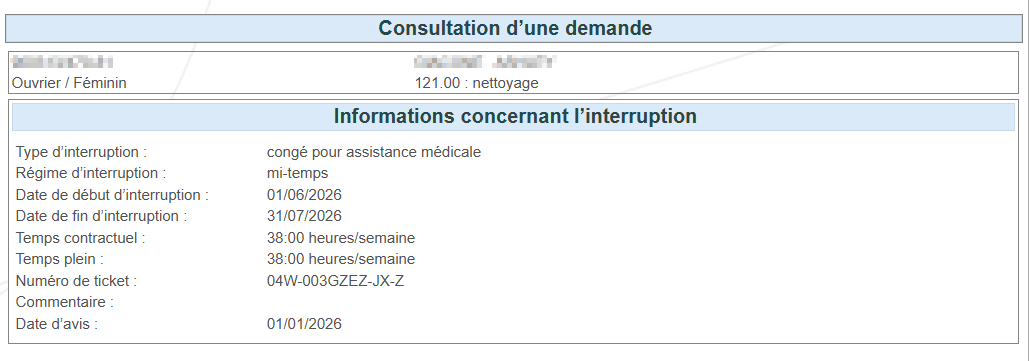
Consultation remains possible as long as the employee has not yet completed their part of the request.

Funded by the European Union – NextGenerationEU. Views and opinions expressed are however those of the author(s) only and do not necessarily reflect those of the European Union or European Commission. Neither the European Union nor the European Commission can be held responsible for them.
National Social Security Office (NSSO)
- Address: Place Victor Horta, 11 - 1060 Brussels
- Telephone: +32 (0)2 509 59 59
- Website: www.onss.be (in french)
You can also get in touch via our Contact page.


